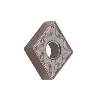
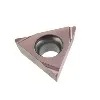
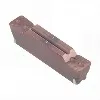
Chamfering Tool Installation and Positioning
The tool setting accuracy of the chamfering tool directly affects the machining quality. Three points should be noted during installation:
Tool Holder Cleanliness: Ensure the tool holder and spindle taper hole are free of chips or oil to prevent tool misalignment.
Clamping Force: Use a torque wrench to tighten to the recommended value. Too loose a clamp will cause vibration, while too tight a clamp may damage the spindle.
Extension Length: Control the tool tip extension to within 1.5 times the cutting length. Excessive extension can cause tool chatter.
Three-Step Precise Tool Setting Method
It is recommended to use a trial cut method combined with machine tool coordinate system settings:
Coarse Positioning: In manual mode, lightly touch the tool tip to the workpiece. Surface, Z-axis coordinate zeroing
Precision Measurement: Perform a 2mm chamfer test cut in the X/Y directions, and measure the actual dimensions using a projector.
Micro-compensation: Input the correction value (usually within ±0.02mm) on the machine tool offset page based on the measurement difference.
Handling Abnormal Situations
Don't panic when encountering these problems:
Asymmetrical chamfer: Check if the tool is installed vertically; spindle radial runout should be ≤0.01mm.
Surface ripples: Reduce the feed rate by 30% or switch to helical interpolation.
Dimensional fluctuations: Confirm workpiece clamping rigidity to prevent displacement during machining.