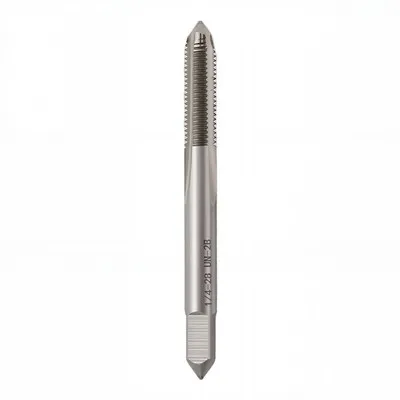
Drilling a hole in a ceramic vase can be a challenging yet rewarding task. Whether you're looking to transform a vase into a unique planter, create a hanging display, or add a functional element to your decor, the process requires precision and the right tools. As a drill bits supplier, I'm here to guide you through the steps of drilling a hole in a ceramic vase, ensuring a successful outcome.


Understanding the Challenges of Drilling Ceramic
Ceramic is a hard and brittle material, which means it can crack or shatter easily if not drilled correctly. Unlike wood or metal, ceramic doesn't have a fibrous structure to hold it together, making it more prone to damage. Therefore, it's crucial to use the right drill bit and technique to minimize the risk of breakage.
Choosing the Right Drill Bit
The type of drill bit you choose plays a significant role in the success of your drilling project. For ceramic, it's best to use a drill bit specifically designed for hard materials. Here are some options available from our range:
- HSS Center Drills: These drill bits are ideal for creating a starting point on the ceramic surface. The center drill helps to prevent the drill bit from wandering, ensuring a more accurate hole. You can find our HSS Center Drills on our website.
- HSS Twist Drill Set: High-Speed Steel (HSS) twist drill bits are a popular choice for drilling ceramic. They are durable and can withstand the high heat generated during the drilling process. Our HSS Twist Drill Set offers a variety of sizes to suit your needs.
- Cobalt HSS Twist Drills: Cobalt HSS twist drill bits are even more robust and heat-resistant than standard HSS drill bits. They are suitable for drilling through thick or hard ceramic materials. Check out our Cobalt HSS Twist Drills for a high-performance option.
Preparing the Vase and Workspace
Before you start drilling, it's essential to prepare the vase and your workspace. Here's what you need to do:
- Clean the Vase: Use a clean cloth to remove any dust, dirt, or debris from the surface of the vase. This will help the drill bit to grip the ceramic better and prevent it from slipping.
- Mark the Drilling Point: Use a pencil or a marker to mark the exact location where you want to drill the hole. Make sure the mark is clear and visible.
- Secure the Vase: Place the vase on a stable surface, such as a workbench or a table. You can use a clamp or a vise to hold the vase in place, ensuring it doesn't move during the drilling process.
- Protect the Workspace: Cover the work surface with a piece of scrap wood or a protective mat to prevent any damage to the surface. You may also want to wear safety goggles and gloves to protect yourself from flying debris.
Drilling the Hole
Once you've prepared the vase and your workspace, it's time to start drilling. Follow these steps for a successful drilling process:
- Start with a Pilot Hole: Use a small drill bit, such as a 1/16-inch or 1/8-inch HSS center drill, to create a pilot hole at the marked location. Apply gentle pressure and drill slowly to avoid cracking the ceramic.
- Switch to the Desired Drill Bit: Once you've created the pilot hole, switch to the drill bit of the desired size. Make sure the drill bit is sharp and in good condition.
- Use a Slow Speed: Set your drill to a slow speed to prevent overheating and cracking the ceramic. A speed of around 500 to 1000 RPM is recommended.
- Apply Steady Pressure: Apply steady and even pressure to the drill bit as you drill. Avoid applying too much pressure, as this can cause the ceramic to crack.
- Keep the Drill Bit Cool: Ceramic generates a lot of heat during the drilling process, which can cause the drill bit to overheat and dull. To keep the drill bit cool, you can use a small amount of water or a lubricant. Apply the water or lubricant to the drilling point using a dropper or a spray bottle.
- Drill in Short Bursts: Instead of drilling continuously, drill in short bursts of a few seconds at a time. This will help to prevent the drill bit from overheating and reduce the risk of cracking the ceramic.
- Check the Progress: Periodically stop drilling and check the progress of the hole. If the hole is not going straight or if you notice any signs of cracking, stop drilling immediately and adjust your technique.
Finishing the Hole
Once you've drilled the hole to the desired depth, it's time to finish it. Here's what you need to do:
- Remove the Drill Bit: Carefully remove the drill bit from the hole. Make sure the drill bit is not stuck in the ceramic.
- Clean the Hole: Use a clean cloth or a brush to remove any dust or debris from the hole. You can also use a vacuum cleaner to suck out any loose particles.
- Smooth the Edges: If the edges of the hole are rough or sharp, you can use a sandpaper or a file to smooth them. Start with a coarse-grit sandpaper and gradually move to a finer-grit sandpaper for a smooth finish.
- Test the Fit: If you're planning to insert something into the hole, such as a plant stem or a hook, test the fit to make sure it's snug. You may need to enlarge the hole slightly if it's too small.
Troubleshooting Common Problems
Drilling a hole in a ceramic vase can sometimes be challenging, and you may encounter some common problems. Here are some solutions to help you troubleshoot these issues:
- Cracking or Shattering: If the ceramic cracks or shatters during the drilling process, stop drilling immediately. You may need to start over with a new vase or try a different drilling technique.
- Drill Bit Slipping: If the drill bit slips on the ceramic surface, you can use a piece of masking tape or a small piece of sandpaper to create a better grip. Place the tape or sandpaper over the marked drilling point and start drilling again.
- Overheating Drill Bit: If the drill bit overheats, stop drilling and let it cool down. You can also use a small amount of water or a lubricant to keep the drill bit cool.
- Uneven Hole: If the hole is not going straight or is uneven, stop drilling and adjust your technique. Make sure the drill bit is perpendicular to the surface of the vase and apply steady and even pressure.
Conclusion
Drilling a hole in a ceramic vase requires patience, precision, and the right tools. By following the steps outlined in this guide and using the appropriate drill bits, you can successfully drill a hole in a ceramic vase without cracking or shattering it. Remember to take your time, apply gentle pressure, and keep the drill bit cool to ensure a smooth and successful drilling process.
If you're interested in purchasing high-quality drill bits for your ceramic drilling projects, we invite you to explore our range of products. Our drill bits are designed to provide excellent performance and durability, ensuring a successful outcome for your projects. Contact us today to discuss your requirements and start your procurement process.
References
- "Ceramic Drilling Guide." DIY Home Improvement Magazine, 2023.
- "Choosing the Right Drill Bit for Ceramic." Tool Review Blog, 2023.
- "Drilling Techniques for Hard Materials." Industrial Tool Handbook, 2023.